English
 Chinese
info@dagyee.com
+8613961861780

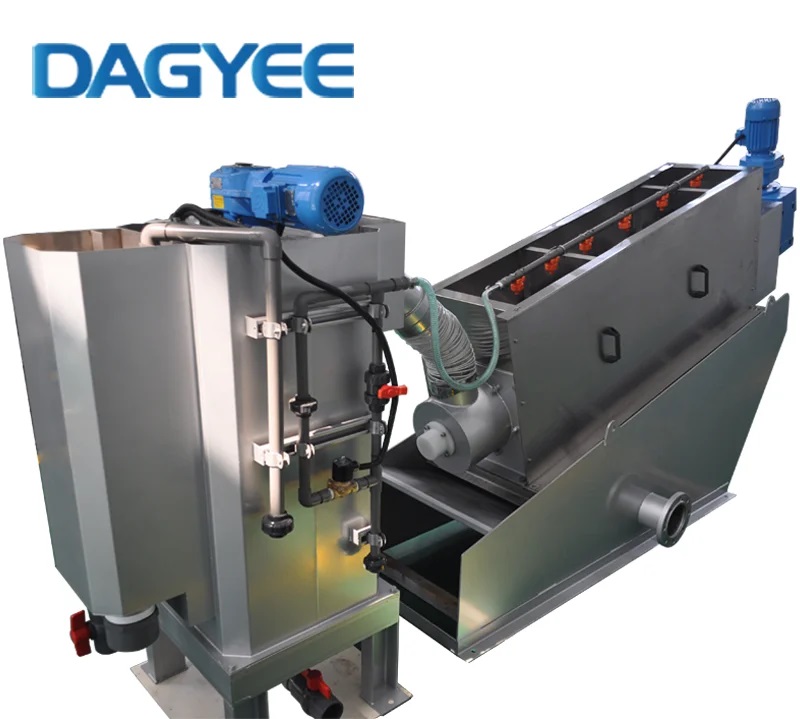
After many years of working in wastewater operation, the most common equipment I encountered was the sludge dewatering machine. Whether in municipal sewage treatment plants or in wastewater treatment stations in factories, they were all using it. To be honest, this equipment is indeed very convenient. It saves electricity compared to the old plate-and-frame type machines, doesn't require someone to be on 24-hour watch, has a built-in cleaning function, and takes up less space. With proper maintenance, it rarely has major problems.
However, I found that many colleagues had fallen into the same pit - either completely neglected maintenance, thinking the equipment was durable, waiting until it broke before repairing it; or blindly maintained, following AI articles on the internet randomly, which only made things worse. I have seen many construction sites where the equipment, which had been used for only a little over a year, started to have problems with poor dewatering effect, frequent blockages, and machine shutdowns. In essence, it was all due to inadequate maintenance or incorrect parameter settings.
Today, I won't talk about those empty theories, won't pile up professional terms, nor will I create those stiff and template-like content. All of this is based on my practical experience in leading a team for wastewater operation over the years, combined with industry experimental data to summarize the practical knowledge on how to maintain, troubleshoot faults, and adjust parameters. I will explain everything in plain language, and beginners can follow it, which will help the equipment have fewer malfunctions and be used for a longer time.
I. First, understand: How does this equipment work? Don't blindly maintain
1.1 Working process, simply put, it's 3 steps
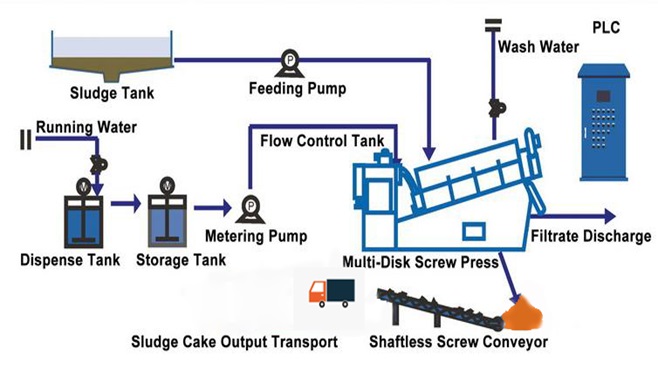
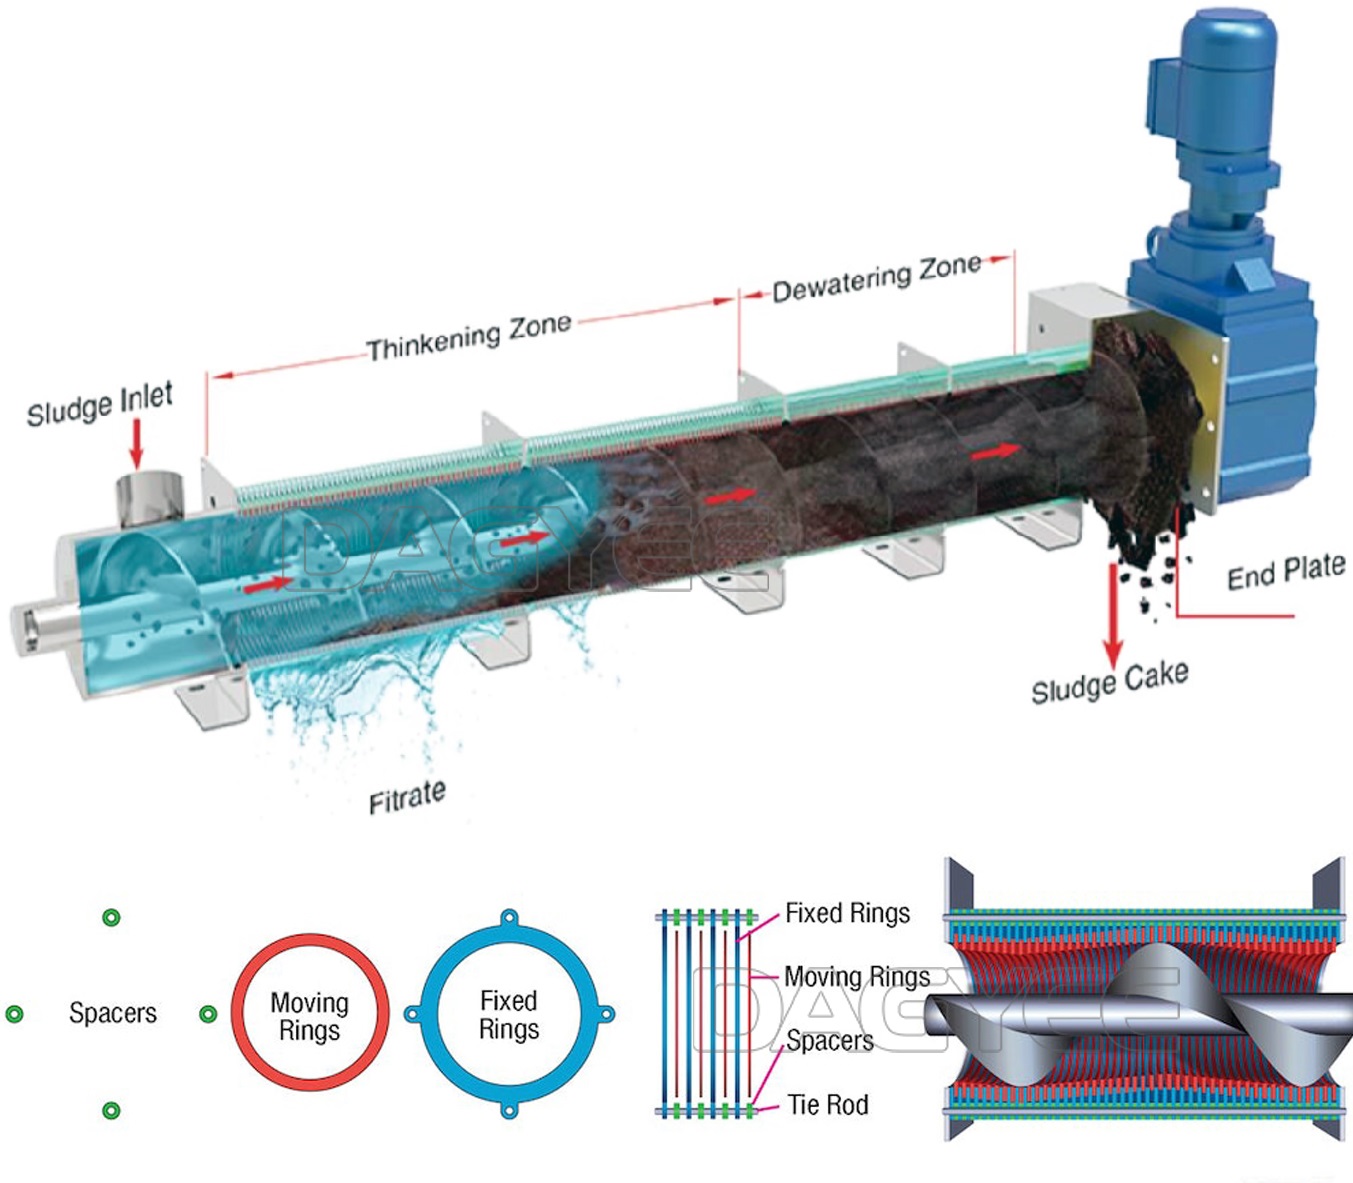
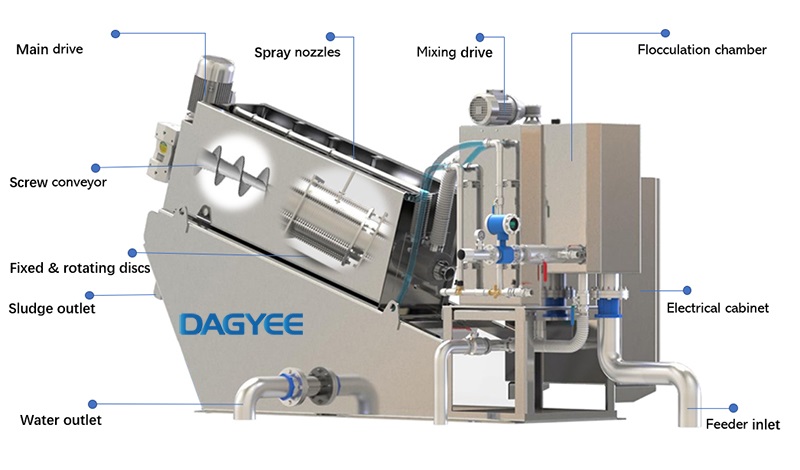
The first step is to add a coagulant to the sludge. In simple terms, it's to make the small particles in the sludge stick together to form large clumps, so that the subsequent dewatering can be more effective. Otherwise, if the sludge is too thin, it won't be able to produce a dry sludge cake. The second step is to send the coagulated sludge to the equipment's feed inlet. There is a spiral main shaft inside that will slowly push the sludge forward.
The key lies in the third step: This spiral main shaft becomes denser and thicker as it moves towards the discharge outlet. As the sludge is pushed forward, the space becomes smaller, and the pressure increases. Under the pressure, the water in the sludge will seep out through the filter screen and the gap between the dynamic and static rings, flowing into the filter liquid tank and being discharged together. The remaining solid sludge is tightly compressed and turns into a dry hard sludge cake, which automatically falls out from the discharge outlet.
There is no need for high-pressure fans or complex hydraulic equipment. It relies entirely on mechanical compression, so it has low energy consumption and doesn't require someone to be constantly watching. It's very convenient to operate. Whether it's industrial chemical sludge, livestock sludge, or municipal biochemical sludge, it can basically handle them, and its compatibility is quite strong.
1.2 Focus on these 5 components, as they are the most prone to problems and have the greatest impact on the equipment's operation
Don't need to remember all the components. It's useless. Focus on these 5, as they are the most likely to have problems and have the greatest impact on the equipment's operation. Pay more attention to them, and you can avoid many troubles:
1) Spiral main shaft: It's like the "heart" of the equipment, responsible for pushing the sludge and generating pressure. It is usually made of stainless steel, prone to wear and corrosion. If it is exposed to a lot of sand and has strong corrosive properties, it will wear out very quickly;
2) Filter screen/Static and Dynamic Rings: They are like "screens" that separate water and sludge. These are the most likely to get clogged and break. When clogged, the dewatering will be slow, and when broken, the sludge cake will be thin and runny. The main maintenance work revolves around them;
3) Drive reducer: It drives the main shaft to rotate. It must be lubricated with oil. Lack of oil or leakage of oil will cause unstable rotation speed and even direct shutdown. I have seen many colleagues who forgot to add oil to the reducer, burning it, and the repair cost was quite high;
4) Spray cleaning system: It consists of several nozzles that spray water onto the filter screen to prevent sludge from sticking and blocking it. If the nozzles get clogged or the water pipes leak, the filter screen will quickly become clogged, making subsequent cleaning extremely troublesome.
5) Seals: Installed at both ends of the main shaft to prevent sludge and water from leaking out. This item tends to age, and once it ages, it will leak. Not only will it dirty the equipment, but it will also corrode internal parts, making later maintenance even more difficult.
II. Common Model Parameter Table, for beginners to directly refer to when selecting and adjusting parameters
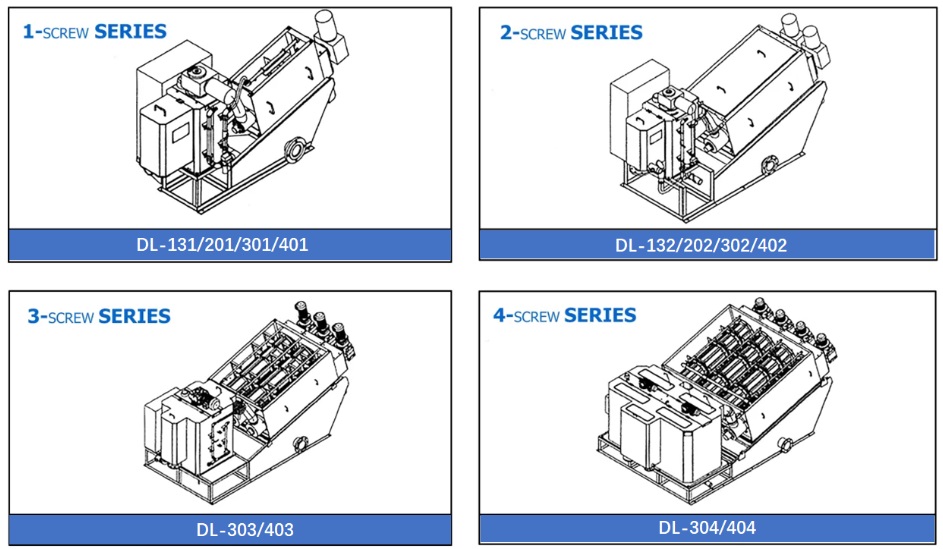
Many beginners when adjusting parameters do not know how to set the rotational speed or the amount of feed. They just try randomly, either resulting in poor dehydration effect or causing the equipment to overload and stop. The following table is the most commonly used standard model parameters on the market. Combined with the actual sludge situation at the site, adjust according to this table, and it is basically error-free.
Note: These are the parameters of conventional models. If the sludge you handle is highly corrosive, has a lot of sand, or has an extremely high concentration, you will need to customize the equipment. The parameters also need to be adjusted slightly according to the specific situation. Do not blindly follow the rules.
| Model | DS capacity (kg/h) | Feed concentration impact (m³/h) |
Size (mm) L×W×H |
Net Kg | Run Kg | Power (kW) |
Washing Q (m³/h) |
||||||
| Min | Max | 2 g/L | 5 g/L | 10 g/L | 20 g/L | 25 g/L | 50 g/L | ||||||
| DL101 | 3 | 5 | 1.5 | 0.6 | 0.5 | 0.25 | 0.2 | 0.1 | 1816×756×1040 | 200 | 290 | 0.2 | 24 |
| DL131 | 6 | 10 | 3 | 1.2 | 1 | 0.5 | 0.4 | 0.2 | 1969×756×1040 | 220 | 315 | 0.36 | 24 |
| DL132 | 12 | 20 | 6 | 2.4 | 2 | 1 | 0.8 | 0.4 | 2069×910×1040 | 275 | 450 | 0.62 | 48 |
| DL202 | 18 | 30 | 9 | 3.6 | 3 | 1.5 | 1.2 | 0.6 | 2500×935×1270 | 470 | 730 | 1.11 | 64 |
| DL301 | 30 | 50 | 15 | 6 | 5 | 2.5 | 2 | 1 | 3255×985×1600 | 850 | 1320 | 0.74 | 40 |
| DL302 | 60 | 100 | 30 | 12 | 10 | 5 | 4 | 2 | 3455×1295×1600 | 1200 | 2230 | 1.11 | 80 |
| DL303 | 90 | 150 | 45 | 18 | 15 | 7.5 | 6 | 3 | 3605×1690×1600 | 1520 | 3080 | 1.86 | 120 |
| DL352 | 120 | 200 | 60 | 24 | 20 | 10 | 8 | 4 | 4240×1550×2190 | 1950 | 3400 | 3.75 | 144 |
| DL353 | 180 | 300 | 90 | 36 | 30 | 15 | 12 | 6 | 4460×2100×2190 | 2600 | 4850 | 6 | 216 |
| DL402 | 120 | 200 | 60 | 24 | 20 | 10 | 8 | 4 | 4140×1550×2250 | 2450 | 3400 | 3.75 | 144 |
| DL403 | 180 | 300 | 90 | 36 | 30 | 15 | 12 | 6 | 4420×2100×2250 | 3350 | 4850 | 6 | 216 |
III. Phased Maintenance: No need to be busy all the time. Just follow the schedule.
Many colleagues find maintenance troublesome. They either check everything constantly, wasting time; or they simply don't maintain at all and wait until the equipment breaks down before repairing it. In fact, I have summarized a simple maintenance schedule with four phases. Each phase involves specific tasks, which is both convenient and can prevent failures. Even beginners can easily master it.
Here is a note: Daily maintenance can be done by on-site operators. It takes only 5 minutes to complete. Weekly, monthly, and annual maintenance should be handled by professional maintenance personnel. The division of labor is clear, and the efficiency is higher. There is also less risk of problems.
3.1 Daily Inspection (Must be done every day, 5 minutes to complete)
Before starting the machine each day, during operation, and after stopping, spend a few minutes checking. This can avoid many unexpected failures. The content in the table is printed out and pasted next to the equipment. On-site operators can follow it and do it without needing to
remember.
| Maintenance Period | Core Tasks | Inspection Acceptance Criteria |
| Pre-Start Inspection |
|
|
| Monitoring During Operation |
|
|
| Post-Shutdown Cleaning |
|
|
3.2 Weekly Maintenance (Stop the machine for 1-2 hours for deep cleaning)
Daily inspections are the foundation. Once a week, a deep cleaning and inspection should be conducted to address any hidden issues and prevent small problems from escalating into major ones. Otherwise, if the machine stops for maintenance, it will cause delays in the project and be more troublesome:
1) Tighten all the bolts and couplings on the equipment. During operation, the equipment will vibrate, and bolts are prone to loosen. Once they loosen, the equipment will shake. Over time, the main shaft and filter screen will wear out faster. Many people have overlooked this detail.
2) Remove the spray nozzles and rinse them with clean water. If they are clogged, use a fine iron wire to clear them. Don't makeshift. If the nozzle is clogged, the filter screen will soon become clogged. Then, cleaning will be more difficult. Replace the water pipe if it leaks. Don't just use the existing connection; a leaking pipe will waste water and dirty the equipment.
3) Add some lubricating grease to the bearings and the rotating parts. If the reducer is leaking oil, check the seal and add some oil. Don't wait until the oil runs out and burn the reducer.
4) Use a high-pressure water gun to clean the gaps between the moving and static rings. Some sludge is stuck inside and cannot be removed by daily spraying. Over time, it will clog. Don't be too forceful when spraying; don't break the filter screen.
5) Check the connection points of the circuit to see if they are loose or aging. Especially in damp areas, don't have a short circuit. A short circuit will not only damage the electronic control system but also pose safety hazards.
3.3 Monthly Maintenance (Carried out by professionals, with problem anticipation)
Once a month, have the maintenance personnel disassemble and inspect the equipment. Focus on checking those components that are prone to aging. Replace them in advance to avoid larger problems when they break down. Otherwise, the losses will be greater:
1) Check the main shaft of the screw and see if it is worn or if the blades are deformed. If the blade is worn thin, the pressing force will be insufficient, the dehydration effect will deteriorate, and the sludge cake will become thinner. At this time, either weld it or replace the blade directly.
2) Replace the sealing parts and gaskets at both ends of the main shaft. These parts are prone to aging, even if there is no leakage, it is recommended to replace them regularly to avoid future leakage and corrosion of the main shaft and reducer. Otherwise, the repair cost will be higher.
3) Drain the old oil from the reducer, clean the box, and add new gear oil. Dirty oil will wear the gears and shorten the lifespan of the reducer. I have seen many colleagues who forgot to change the oil. The reducer broke after only two years of use.
4) Calibrate the flow meter and pressure sensor for the feed. Otherwise, the parameters will be inaccurate, and the adjustment will be in vain. For example, if the feed volume exceeds the standard, the instrument shows normal, but the equipment is prone to overload and stop.
5) Check the frame of the equipment to see if it is peeling paint or rusting. Repair the peeling areas. Don't let the frame rust and corrode. If the frame is damaged, the entire equipment will shake, affecting the stability of operation.
3.4 Annual Overhaul (Comprehensive inspection, equivalent to giving the equipment a "physical examination")
After the equipment has been in use for one year or has accumulated more than 8,000 hours of operation, a comprehensive overhaul must be conducted. Check all components to ensure stable operation in the next year. Don't skimp on this maintenance cost; otherwise, if the equipment has a major failure, the losses will be greater:
1) Disassemble the entire equipment, check each component such as the main shaft, filter screen, moving and static rings, and bearings. Check for wear, deformation, and corrosion. Repair or replace any problematic components in time.
2) Replace those components that are close to their service life at once, such as the filter screen, sealing parts, and bearings. Don't wait until they all break down and delay production. Prepare in advance and replace them quickly.
3) Re-calibrate the concentricity of the main shaft and the coaxiality of the drive system. Otherwise, the equipment will shake and wear out faster. This step is very important. Many equipment have abnormal sounds due to inaccurate concentricity.
4) Perform an anti-corrosion and rust removal on the entire machine. Spray anti-corrosion paint on the frame and main shaft. Especially for equipment dealing with corrosive sludge, this step can extend the overall lifespan of the equipment.
5) After the repair is completed, conduct a test run without any load for a period of time to check for any abnormal noises or leaks. Then, run with materials to adjust the parameters and ensure that the dehydration effect and operational stability meet the standards. Once everything is fine, officially put it into use.
VI. Practical Optimization Techniques: Cost-saving and Efficiency Enhancement, Proven Effective
Proper maintenance is the foundation. If we can further optimize the operating parameters and processes, we can save a considerable amount of electricity and chemical costs, and improve the dehydration efficiency. The following tips are all summarized from my practical operations and have been proven effective. Even beginners can master them.
1) Do not blindly add flocculants: Different sludges require different flocculants and the dosage varies. Conduct small tests regularly to find the minimum dosage that ensures the dehydration effect while saving on chemical costs. I have seen many colleagues who added too much flocculant, which not only wasted resources but also caused filter blockage, resulting in a loss of more than what was saved.
2) Match the rotation speed and feed volume: For thick and sticky sludges, slow down the screw rotation speed to allow the sludge to be pressed for a longer time, making the sludge cake drier. For thin sludges, slightly increase the rotation speed to improve processing efficiency. Do not always use the same rotation speed; otherwise, either the dehydration effect will be poor or electricity costs will be wasted.
3) Pay attention to filter net cleaning: Spray with clean water regularly and soak with a weak alkaline cleaning agent every 3 months to remove organic matter and dirt from the filter net pores. This way, the filter net can last longer and is less likely to get clogged. It is much better than constantly rinsing with clean water.
4) Stabilize the incoming sludge: Add a thickening tank and a homogenization tank before the equipment to ensure stable sludge concentration and flow. Avoid fluctuations in sludge concentration and flow, as this can lead to equipment malfunctions and unstable dehydration results. Stabilizing the front-end conditions can significantly reduce maintenance efforts.
5) Install frequency converters for better energy savings: Add a frequency converter to the motor and feed pump. Increase the power when the sludge is abundant and decrease it when it is scarce. This way, the equipment does not need to operate at full capacity all the time, resulting in significant electricity savings over the long term. This effect is more pronounced in large sewage treatment plants.
V. Closing Thoughts: Well-maintained Equipment is Stress-Free
In fact, the maintenance of screw-type sludge dewatering machines is not difficult. No need to have a deep understanding of professional knowledge, nor do you need to be constantly busy. Just follow what I have mentioned above, conduct regular inspections, weekly cleaning, monthly maintenance, and annual overhaul. Pay close attention to wear parts and, when encountering faults, check the table for troubleshooting. This way, the equipment can have fewer problems and last longer.
Many colleagues think that maintenance is troublesome and always want to "fix it when it breaks." However, in the end, the cost of emergency repairs and the loss of production due to downtime are much higher than the cost of regular maintenance. Especially for sewage treatment plants and industrial wastewater treatment stations, stable equipment operation is essential for meeting environmental protection standards and can significantly reduce maintenance costs.
If you encounter any faults not mentioned in the table during actual operation, or if you are unsure how to adjust the parameters, please feel free to contact me. I will provide you with specific solutions based on my first-hand experience. Let's exchange ideas and help each other to avoid pitfalls and save time.

Name: Ashely Li
Mobile:+8613961861780
Tel:+8613961861780
Whatsapp:8613961861780
Email:info@dagyee.com
Add:Room 302, Building 11-4, Hongyi Road, Xinan Town, Xinwu District, jiangsu Province, China